AKS Wifi > Connect A Device
Please select the type of device you want to connect to the network
- Open your device wi-fi settings and connect to the AKS-Wireless network.
- Enter your school username (not e-mail address - it should simply be in the form 17jobloggs for pupils or jobloggs for staff) and password.
If you are a visitor you will need a pass from reception containing login details
- If you are asked Continue Connecting? or similar, press Connect (or Continue or Yes)

- Open your device wi-fi settings and connect to the AKS-Wireless network.
- Enter your school username (not e-mail address - it should simply be in the form 17jobloggs for pupils or jobloggs for staff) and password.
If you are a visitor you will need a pass from reception containing login details
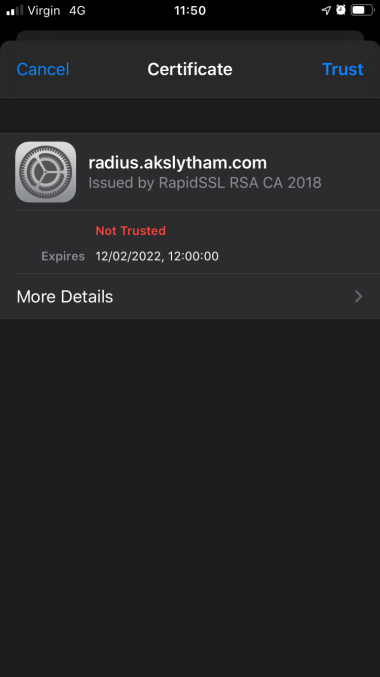
- Press "Trust" when this screen appears:
- Open your device wi-fi settings and connect to the AKS-Wireless network.
- Enter your school username (not e-mail address - it should simply be in the form 17jobloggs for pupils or jobloggs for staff) and password.
If you are a visitor you will need a pass from reception containing login details
- Press "Trust" if asked about trusting radius.akslytham.com
- Open your device wi-fi settings and connect to the AKS-Wireless network.
- Use school username (not e-mail address - it should simply be in the form 17jobloggs for pupils or jobloggs for staff) and password.
If you are a visitor you will need a pass from reception containing login details
- Fill out the fields as below. Not all fields are shown depending on the version of Android.
- EAP method: PEAP
- Phase-2 authentication: MSCHAPV2 (this might be under Advanced)
- CA Certificate: Use system certificates
- Domain: radius.akslytham.com
- Identity: Your school username (not e-mail address)
- Anonymous Identity - leave this one empty
- Password: your school password

AKS Wifi > Configure This Device
Please select the type of device you want to configure for the network. You should be running this on the actual device you want to use.
Now your device is connected you will have limited access to services such as Office 365, but most things (including Google) will show error messages until you install the filtering certificate.
- Download the certificate (click here)
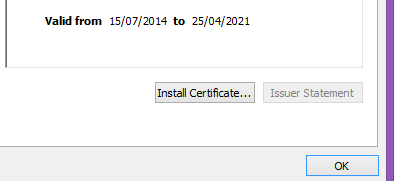
- Open the certificate and click Install Certificate...
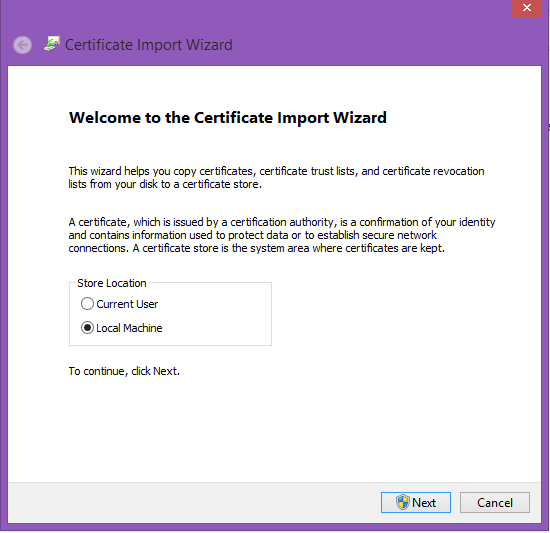
- Select Local Machine then click Next
- Select Place all certificates in the following store, then browse for Trusted Root Certification Authorities:
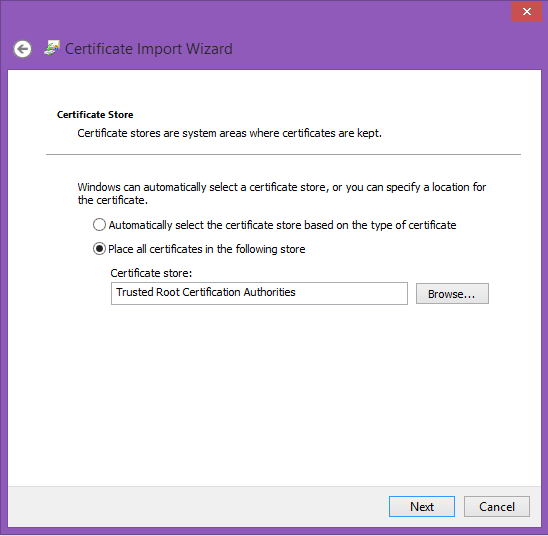
- Finish the wizard, and refresh your browser to access the Internet.
Now your device is connected you will have limited access to services such as Office 365, but most things (including Google) will show error messages until you install the filtering certificate.
- Download the certificate (click here)
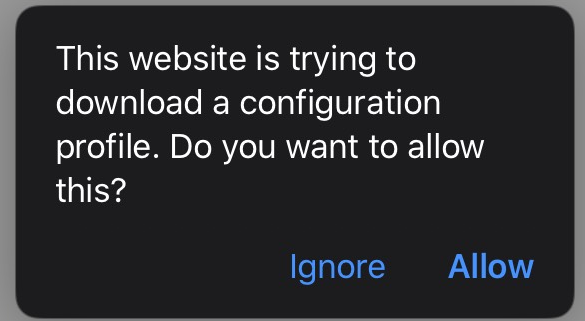
- Click on Allow when asked about a configuration profile
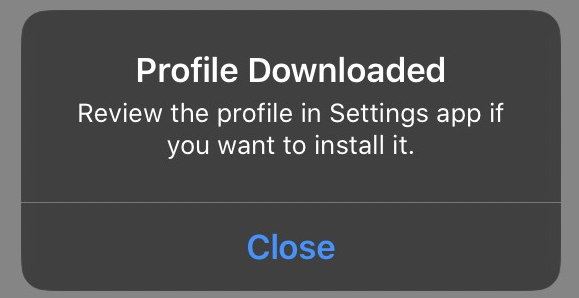
Then click Close
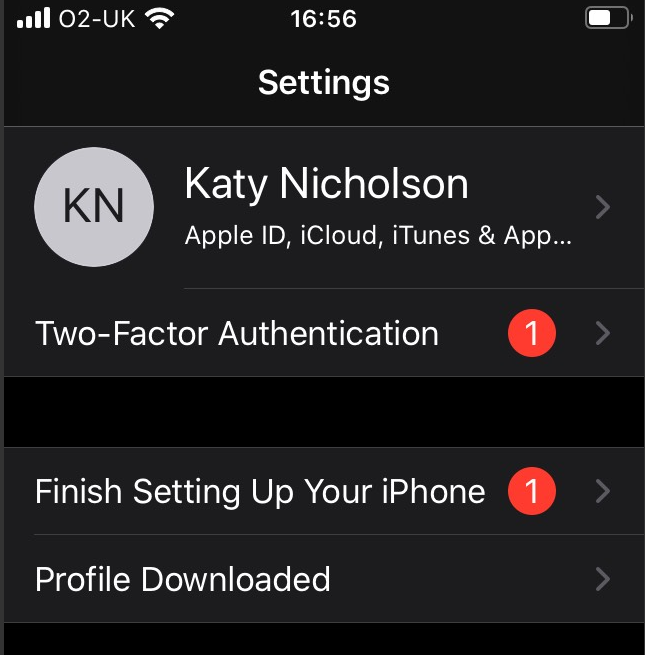
- Go to Settings on your iPhone or iPad, then tap on Profile Downloaded
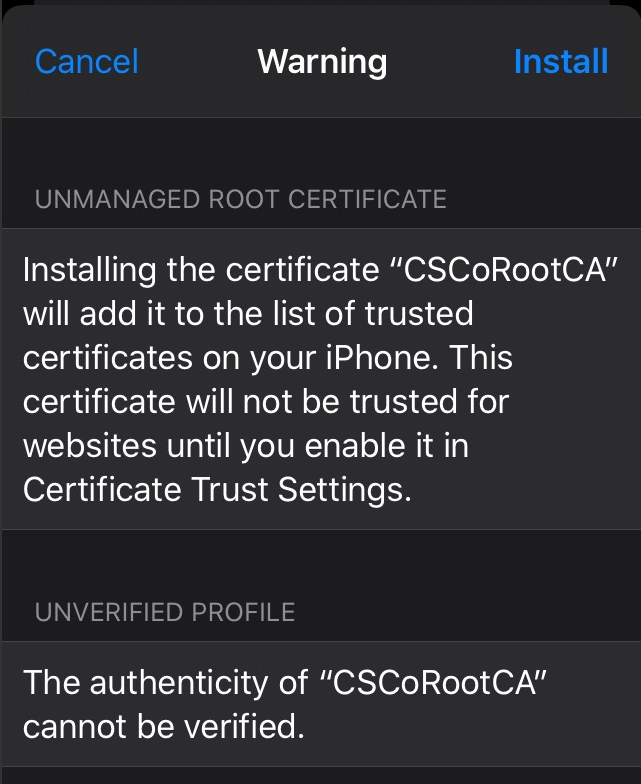
- Click on Install to set up the United Learning certificate, this is required for the Internet filtering to work.
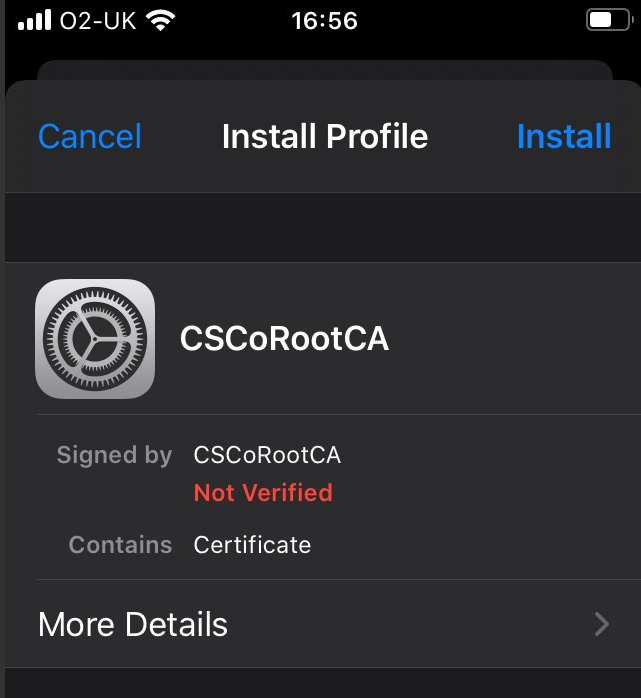
and then click Install on the warning that pops up:
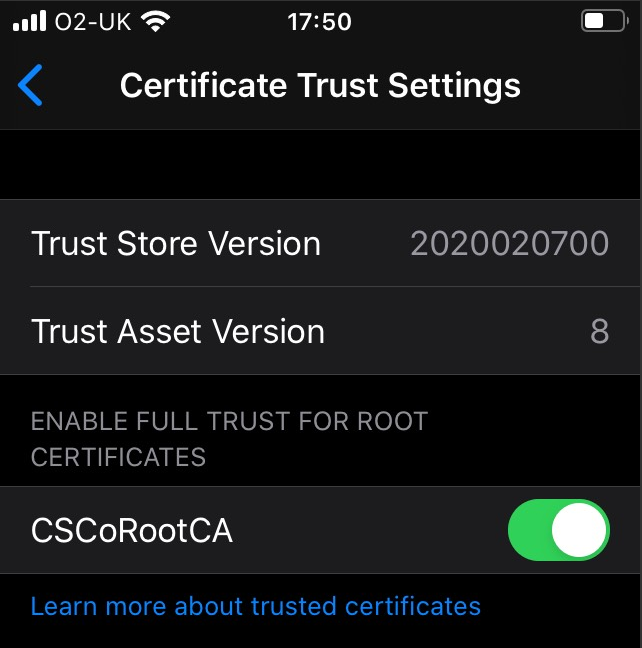
- Finally in Settings go to General ->About -> Certificate Trust Settings (bottom of the screen) and enable CSCoRootCA:
Now your device is connected you will have limited access to services such as Office 365, but most things (including Google) will show error messages until you install the filtering certificate.
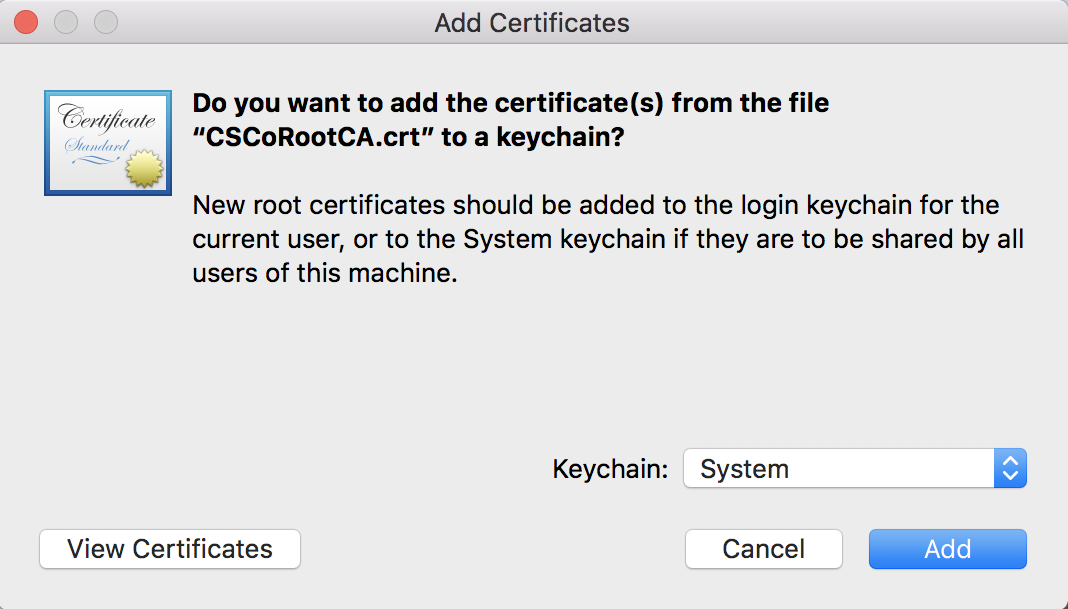
- Download the certificate (click here)
- Open the certificate, change the Keychain to System, then press Add. You will then be prompted for your credentials - this is your macbook password, not your school one.
- In the Keychain app that should have appeared, go to System, then find CSCoRootCA and double-click on it.
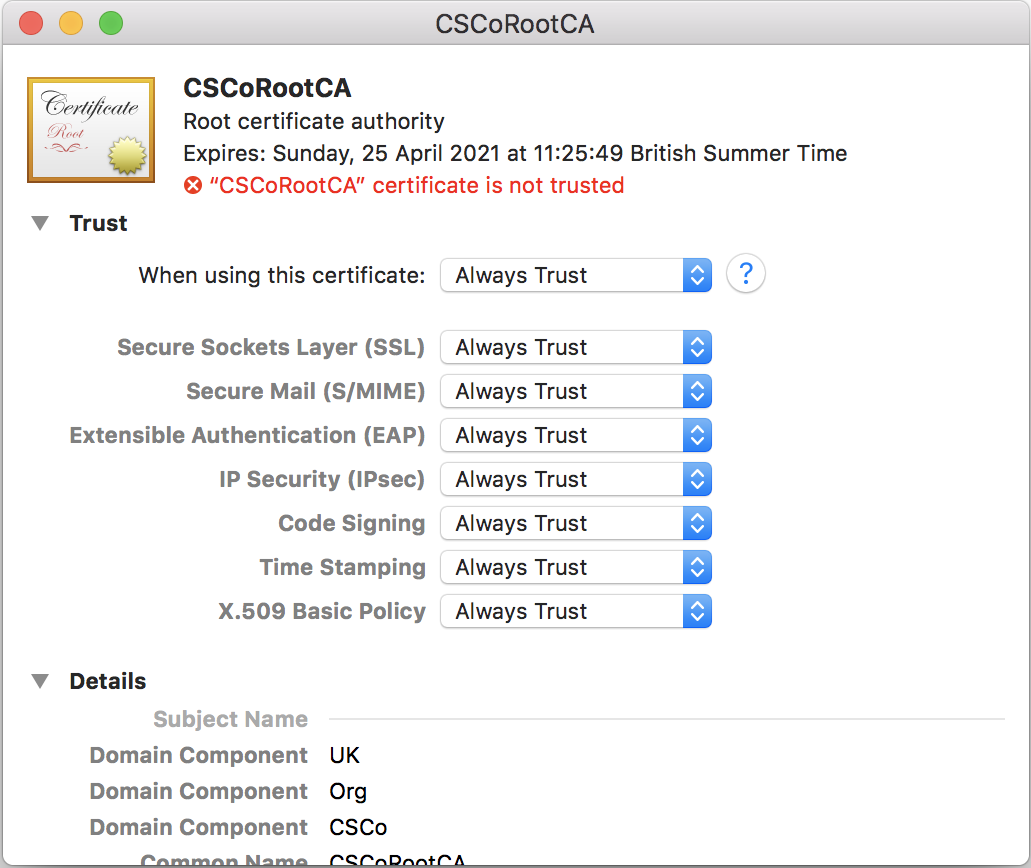
Change the top field ("When using this certificate") to Always Trust.
Now your device is connected you will have limited access to services such as Office 365, but most things (including Google) will show error messages until you install the filtering certificate.
- Download the certificate (click here)
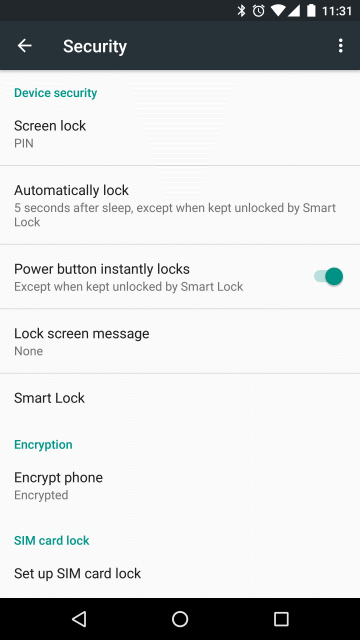
- If you don't have a PIN set, go to Settings -> Security -> Screen Lock and set one up:
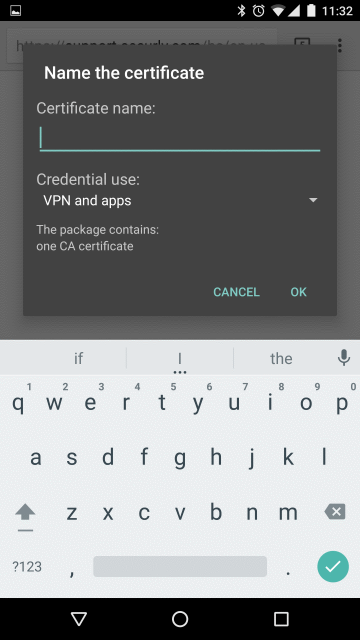
- Click on the certificate: CSCoRootCA.crt
- Enter a name at the Name the certificate screen (e.g. AKS or CSCORootCA):